You want to get strong? Ya need to strain. Not just once or twice, but over the course of your entire lifting career. Not every day, most of the time it’s just 1–4 times a month, depending on how strong you are and what your training history looks like.
Before we dive in, do me a favor, define the word strain. You might picture yourself or someone else on the toilet, constipated, impatient, shaking a leg, syncing a hard push with an abdominal contraction, eyeball popping out of their head, inadvertently risking a blown-out hemorrhoid.
That’s not the strain I’m talking about. In that case, definitely don’t strain. Slow down, calm your breath, trust that you’ll make it through, and maybe consider upping your vegetable and water intake?
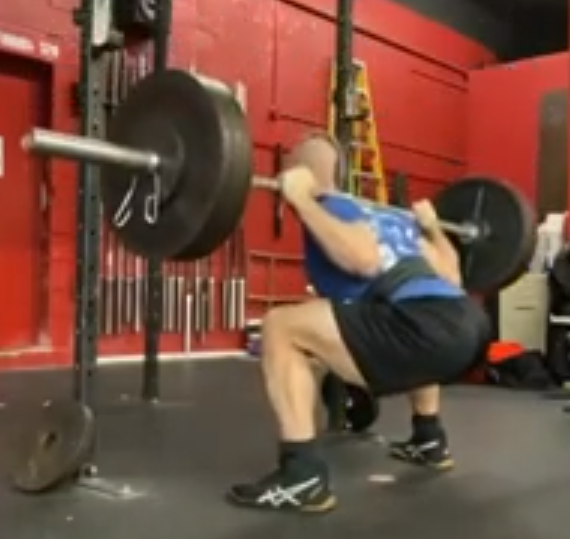
What I’m talking about is training strain — the kind that comes from exerting maximum effort to complete one or more reps. When testing a rep max (usually 1–5 reps), that might mean adding enough weight on the bar until true strain occurs. Or it could be training close to failure, stopping just one or two reps shy of your absolute limit.
Until you cross a certain threshold, you won’t trigger the adaptations you’re chasing. And to be honest, getting stronger doesn’t mean breaking a personal record every time you must hit a Rep Max or AMRAP set. Most days, it won’t be your all-time best, it just needs to push past that invisible line, the strain threshold.
Don’t get me wrong we want to cross that line but there are plenty of times when we deliberately stay below that line, when you’re new to a program, coming off an injury, or focused on building pain-free, high-quality movement patterns. In those phases, the goal isn’t raw strength; however you’ll still get a little stronger from it, it’s clean, confident movement.
We tend to get attached to numbers. Here’s the truth: the numbers don’t matter, straining with good form does. Strength improves when you lift enough weight with solid technique and allow your body the recovery it needs. You don’t get stronger by lifting heavy weights; you get stronger from recovering from lifting heavy weights. PR strength shows up when it wants to, it gets more unpredictable the longer you train. But everyday strength, the kind that sticks, grows each time you hit that strain when it’s programmed.
Of course, straining comes with risk. As loads and effort climb, so does the chance of side effects. If your body hasn't probably adapted to straining past that strength threshold, it can exceed your body’s ability to recover from it. That’s why it’s smart to start each training and each training block conservatively, building up as your movement patterns solidify.
Over time, through reflection and experience, every lifter develops a personal blueprint — a way of training that fits their body. You build it by progressing slow, taking good notes, paying attention to what works and what doesn’t, developing awareness, and communicating with your coach (if you’ve got one).
Not everything can be avoided, but a solid plan helps you strain more effectively. Early on, you don’t know which movements fit you best and you don’t know how you will respond to strain. With experience, you start to learn your body’s language, which exercises serve you, which cause setbacks, and how to push past that strain threshold.
These are the parameters you’ve got to pay attention to and work within. Ignore them and then when you decide to push you’re probably gonna blow out an O-ring.
The ultimate goal of a lifter is to develop the capacity to effectively strain and understand that straining and recovering from that strain is all you need to stay strong and keep getting strong, for the long haul.